
Smart Blind Installation for a Refined Home
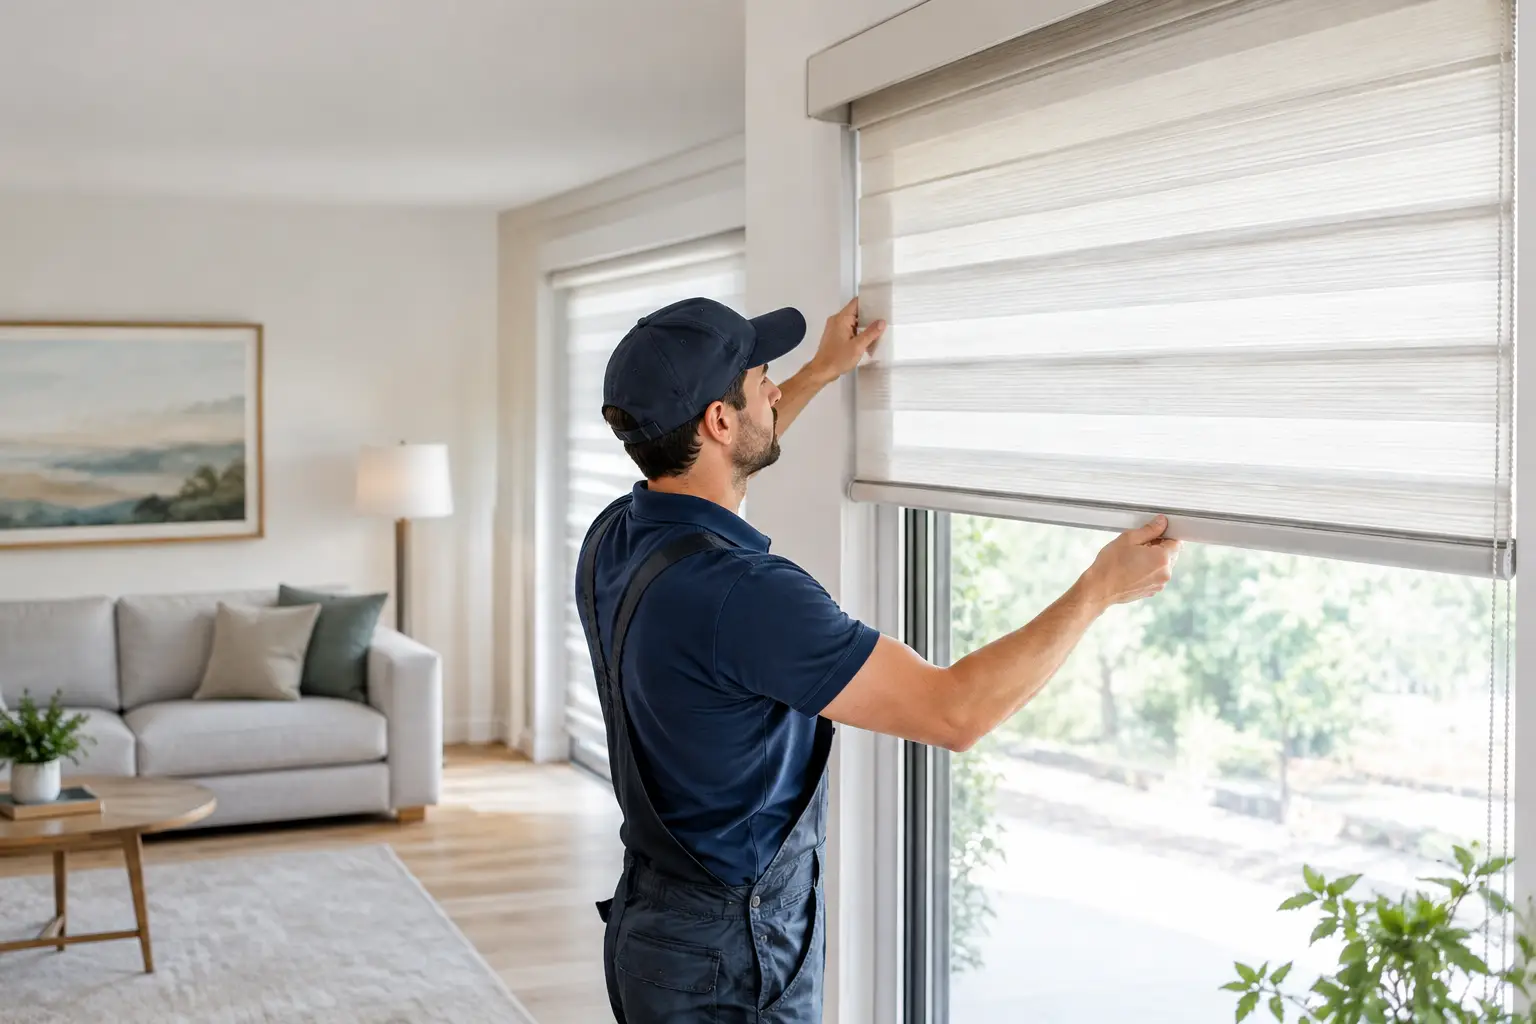
A smart blind installation is one of those home upgrades that changes the feel of a room long before anyone notices the technology. Morning light arrives on schedule, afternoon glare is softened before it reaches the sofa, and a movie night begins without crossing the room to adjust every window. The result is not simply automation. It is a more considered, comfortable home.
The best installations begin with decisions made before a shade is ordered or a bracket is mounted. Window shape, power access, control preferences, and the role each room plays all influence the finished look. Get those details right, and motorized window treatments become a quiet expression of elevated living rather than another gadget asking for attention.
Start Smart Blind Installation With the Window
Measure every window individually, even when a room appears perfectly symmetrical. Older homes, new builds, and apartment windows can all vary by enough to affect the fit. For an inside mount, take the width at the top, middle, and bottom of the opening, then use the narrowest measurement. Measure the height in several places as well, and note the depth of the window frame.
Inside-mounted blinds have a clean, architectural appearance, but they need sufficient depth for the headrail, brackets, and fabric to sit properly. They are an elegant choice when trim is worth showing off or when windows have a deep, finished recess. A shallow frame, protruding handles, crank windows, or uneven openings may call for an outside mount instead.
Outside-mounted blinds sit above and beyond the window opening. They can make a modest window feel larger, conceal uneven trim, and provide better light control because there are fewer side gaps. This option is especially compelling in bedrooms, media rooms, and spaces with intense sun exposure. It does require thoughtful placement: confirm that there is room above the window for the headrail and that the shade will not interfere with molding, artwork, or a nearby door.
Treat the measurement process as a design appointment, not a quick errand. Record the window location, width, height, depth, mount style, and any obstacles. A simple sketch or a labeled photo prevents ordering mistakes when a home has several similar windows.
Choose the Right Treatment for the Room
“Smart blinds” describes a broad category. The right treatment depends on how you use the space and the atmosphere you want to create. Cellular shades offer insulation and a soft, tailored profile, making them well suited to bedrooms and rooms that run warm or cool. Roller shades feel spare and contemporary, with fabrics ranging from airy solar weaves to room-darkening options. Roman shades bring softness and dimension to living rooms, dining areas, and other spaces where the window treatment is part of the decor.
Light filtering is just as important as style. A sheer or solar fabric can preserve a view while tempering harsh brightness in a sunlit office. Room-darkening materials help with sleep and screen visibility, but they do not always block all light around the edges. For the strongest effect, pair a blackout shade with an outside mount or layer it beneath drapery.
Consider the room after dark, too. A fabric that looks beautifully translucent during the day may offer limited privacy once interior lights are on. Bathrooms, street-facing rooms, and ground-floor bedrooms usually benefit from more opacity or a layered solution.
Select a Power Method Before You Order
Power is the practical heart of smart blind installation, and there is no single best choice for every home. Battery-powered shades are often the easiest path for existing spaces because they avoid electrical work and preserve walls. Many use rechargeable battery wands or removable packs concealed behind the headrail. They are ideal for a small group of accessible windows, rentals where permitted, or rooms being refreshed without renovation.
The trade-off is maintenance. Battery life depends on shade size, weight, daily use, temperature, and features. A wide blackout shade used several times a day will generally need attention sooner than a lightweight roller shade used occasionally. Before choosing batteries, think about access. A high clerestory window may look spectacular, but it is not a convenient place to recharge a battery pack.
Hardwired shades offer the most polished long-term approach, particularly for whole-home projects, tall windows, or rooms with several treatments. Wiring is hidden, operation is consistent, and there is no recurring charging routine. The catch is timing: hardwiring is easiest during construction or a renovation, when an electrician can run low-voltage power before walls are closed. Retrofitting is possible, but it adds cost and may require more careful planning.
Solar charging panels can extend the time between charges on compatible battery shades. They work best on windows that receive dependable daylight and where a small panel can be placed discreetly. They are a practical addition, not a substitute for checking compatibility and positioning.
Plan Controls Around Daily Life
A premium smart shade should feel intuitive to everyone who uses the room. App control is useful for schedules, travel, and remote adjustments, but it should not be the only way to operate a window treatment. A wall-mounted keypad or handheld remote gives guests, children, and less tech-focused household members an immediate option.
Voice control can be particularly satisfying in kitchens, bedrooms, and media rooms, where hands are occupied or the lights are already part of a connected-home routine. Still, voice platforms and smart-home ecosystems vary. Confirm that the shades work with the system you already use rather than assuming every product communicates with every assistant or hub.
Automation should follow your habits, not create unnecessary movement. A bedroom shade might rise gradually on weekday mornings and close at sunset for privacy. In a south-facing living room, a solar shade can lower during the brightest afternoon hours to protect wood floors, artwork, and upholstery. A media room may call for a single scene that lowers shades, dims lighting, and prepares the space for a film.
Avoid scheduling every shade to move at the same moment simply because the option exists. Different rooms have different needs, and subtle, useful routines feel more luxurious than constant activity.
Installation Details That Affect the Finish
Once the design and power plan are settled, installation itself rewards patience. Begin by confirming the product label against the window label. Place brackets at the recommended spacing, keeping them level and clear of any internal mechanisms. Use a stud when available; otherwise, use anchors rated for the wall material and the weight of the treatment. A large shade mounted into drywall with inadequate anchors can sag, pull loose, or operate unevenly.
Before snapping the headrail into place, inspect the orientation of the motor, charging port, and control buttons. These details are much easier to address before the blind is fully installed. After mounting, run the shade through several complete up-and-down cycles. Listen for rubbing, watch for fabric tracking to one side, and make sure the bottom rail lands evenly.
Some systems require setting upper and lower limits, while others calibrate automatically. Follow the manufacturer’s instructions precisely here. Incorrect limits can leave the shade stopping short, pressing too firmly into a sill, or failing to fully cover the glass. If a treatment does not move smoothly after a level check and calibration, stop rather than forcing it. Bracket alignment, mounting surface, or fabric tension may need correction.
For wide, heavy, unusually high, or hardwired treatments, professional installation is often worth considering. The value is not just speed. An experienced installer can assess hidden wiring, uneven walls, tall-ladder safety, and the alignment that gives high-end window treatments their composed finish.
Make Smart Shades Part of the Interior
Technology should support the room rather than dominate it. Select hardware colors that disappear into the window frame or coordinate with surrounding finishes. White headrails can recede into light trim, while darker finishes can feel intentional against black-framed windows or richly painted walls. Keep charging cords and solar accessories as discreet as possible, especially in formal spaces.
Layering adds both visual depth and practical control. A solar roller shade behind full drapery can manage glare during the day while drapery provides softness and stronger nighttime privacy. In a bedroom, a room-darkening shade paired with linen panels offers a more finished look than either treatment alone.
Smart blinds also create a thoughtful bridge between design and energy comfort. Cellular designs can help reduce heat transfer at the window, while scheduled closing can lessen late-day solar gain. Expectations should stay realistic: window treatments complement efficient windows and HVAC planning; they do not replace them. Yet in rooms with difficult sun exposure, that added layer of control can make a noticeable difference in comfort.
A beautifully planned smart blind installation earns its place by making daily rituals feel easier. Choose the right fit, power method, fabric, and controls, then let the system quietly do its work. The most refined smart home features are not the ones that announce themselves. They are the ones that make every room feel ready when you walk in.








Leave a comment