
Sneaker Cleaning Guide: Clean and Protect Your Kicks
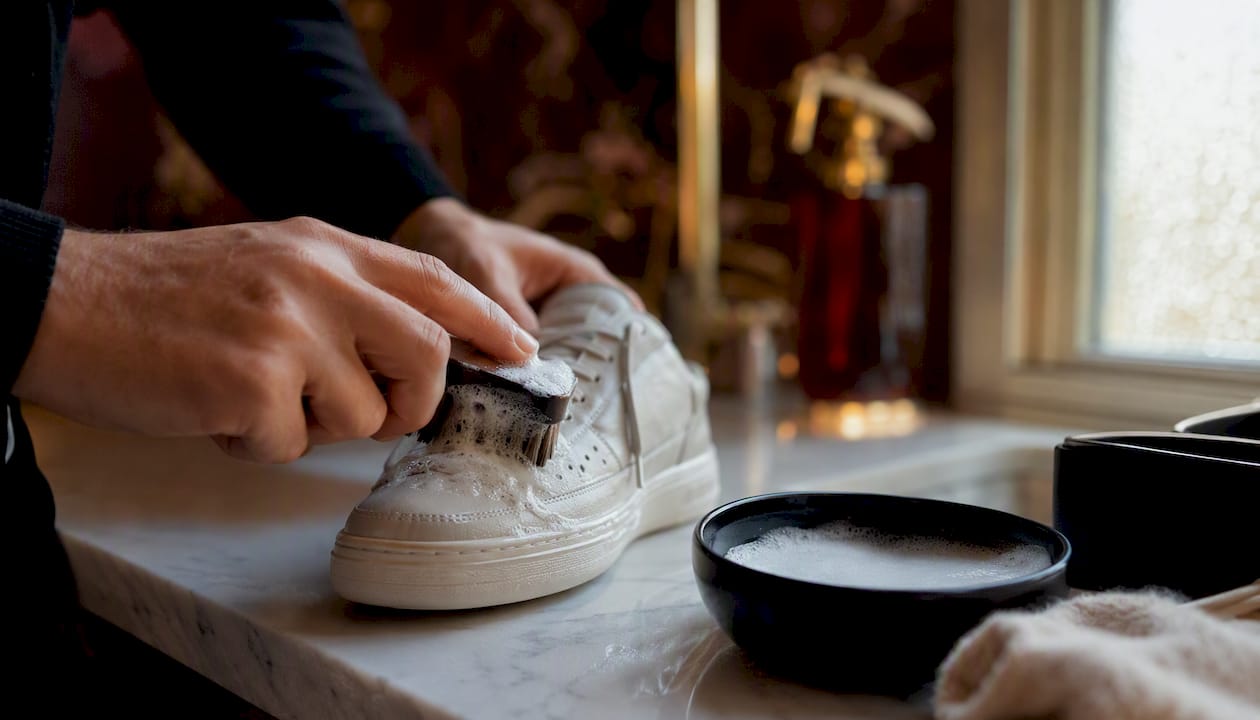
For most sneakers, the safest at-home method is a dry brush to remove loose dirt, followed by a gentle hand-clean with mild soap and warm water, then blotting and air-drying at room temperature. This approach works across leather, canvas, and knit uppers without risking adhesive failure or color loss. Two cautions to keep front of mind before you touch a single brush to your shoes:
- Never machine wash leather or suede. Water saturation and tumbling distort shape and weaken the glue that holds soles in place.
- Skip bleach and direct heat entirely. Both cause yellowing and can separate bonded layers permanently, as Vice warns.
Pro Tip: Always test any cleaning solution on a hidden area first — the inside of the tongue or a back heel panel — before applying it to a visible surface.
Key Takeaways
A prevention-first routine — dry brush, mild soap, air-dry, and protective spray — is the most effective way to keep sneakers clean and extend their life without risking irreversible damage.
| Point | Details |
|---|---|
| Default cleaning method | Dry brush, then mild soap and warm water by hand, then blot and air-dry at room temperature. |
| Material-specific caution | Never machine wash leather or suede; match your cleaner and technique to the upper’s material. |
| Heat and bleach are permanent risks | Both cause yellowing and adhesive failure; air-dry only, and skip bleach on all materials. |
| Maintenance beats restoration | Routine brushing and protective spray every 4–6 weeks preserve finishes better than periodic deep cleans. |
| Mytotaltake premium care kit | A curated cleaner, brush set, microfiber cloths, and protective spray for leather, suede, canvas, and knit uppers. |
Table of Contents
- What you need before starting your sneaker cleaning guide routine
- Step-by-step: the full sneaker cleaning workflow
- How to clean by material: leather, suede, canvas, knit, and rubber
- How to clean, dry, and when to replace laces and insoles
- Drying, reshaping, and storage best practices
- Targeted fixes for scuffs, grease, yellowing, salt stains, and ink
- How to protect sneakers and maintain them between deep cleans
- Big mistakes that permanently ruin sneakers and how to avoid them
- How long a clean takes and what it typically costs
- Myth vs. fact: what the research actually says about home remedies
- A practical perspective on sneaker care
- Mytotaltake’s premium sneaker care collection
- Sources
What you need before starting your sneaker cleaning guide routine
Better Homes & Gardens identifies soft brushes, mild detergent, and microfiber cloths as the core tools for most shoe-cleaning tasks. Gather these before you start:
- Soft shoe brush or old toothbrush — for uppers and tight seams
- Microfiber cloths (at least two) — one for cleaning, one for blotting
- Small bowl of warm water
- Mild liquid dish soap or pH-neutral cleaner — diluted to roughly one part soap per ten parts water
- Soft towel for blotting
- Mesh laundry bag — only if machine washing canvas per manufacturer guidance
- Shoe trees or crumpled newsprint — to hold shape during drying
- Dedicated sneaker cleaner — worth having for frequent wearers or premium materials
- Hydrogen peroxide — for white canvas only, used sparingly and tested first
For leather uppers, use a leather-specific or pH-neutral cleaner rather than dish soap, which can strip natural oils over time. Synthetic and vegan leather uppers respond well to gentle soap and water, though The Cork Store notes that some synthetic finishes react differently than genuine leather, so a patch test is non-negotiable. Avoid bleach and concentrated detergents on any colored or delicate material.
Pro Tip: Keep your cleaning solution mild. A weaker mix that you apply twice is safer than a strong one applied once.
Step-by-step: the full sneaker cleaning workflow
PicaasoFootwear’s home-DIY baseline confirms the sequence that professional cleaners use: remove laces and insoles, dry-brush, hand-clean with mild soap and warm water, rinse thoroughly, and air-dry. Follow these steps in order.
- Prepare the shoes. Remove laces and insoles. Check the care label inside the tongue for any manufacturer restrictions. Stuff the shoe with newsprint or insert shoe trees to hold its shape throughout cleaning.
- Dry-brush loose dirt. Use a soft brush to knock off dried mud and dust from the outsole, midsole, and uppers before any liquid touches the shoe. Cleaning wet dirt just spreads it.
- Mix your cleaning solution. Combine a small amount of mild soap with warm water. GQ’s experts recommend starting with the mildest option and escalating only when necessary, because aggressive solvents can permanently alter texture and color.
- Spot-test first. Dip a microfiber cloth or soft brush into the solution, wring it nearly dry, and test on a hidden panel. Wait two minutes before proceeding.
- Clean laces separately. Hand-soak laces in the mild solution for 10–15 minutes, then gently scrub and rinse. Set aside to air-dry.
- Clean midsoles and uppers. Work in small circular sections with your brush or cloth. Use light pressure. Rinse the brush frequently to avoid redepositing dirt.
- Wipe away residue. Use a clean damp cloth to remove any soap film. Soap left on the surface can attract more dirt or cause discoloration as it dries.
- Blot, reshape, and air-dry. Press a dry towel firmly against damp areas to absorb moisture. Re-stuff with newsprint, then leave at room temperature away from direct sunlight. Never use a dryer, radiator, or hair dryer.
Estimated time: A full hand-clean typically takes 30–90 minutes of active work, plus several hours of drying time. A quick spot-clean runs 10–20 minutes.
How to clean by material: leather, suede, canvas, knit, and rubber
Different materials need different handling. The general workflow above applies to most, but these material-specific adjustments prevent damage.
| Material | Best method | What to avoid | Quick tip |
|---|---|---|---|
| Leather | Damp cloth with leather cleaner; condition after | Soaking, dish soap, machine washing | Apply leather conditioner after every clean |
| Suede / nubuck | Dry brush only; suede eraser for scuffs | Any liquid beyond a light mist; machine washing | Brush in one direction to restore nap |
| Canvas | Mild soap and water; hydrogen peroxide paste for whites | Bleach, machine wash unless label permits | Test whitening paste on a hidden seam first |
| Knit / mesh | Diluted soap, gentle dabbing with soft cloth | Abrasive scrubbing that frays yarn | Blot, never rub |
| Rubber soles | Non-gel white toothpaste or melamine sponge | Acetone on colored rubber | Rinse thoroughly to prevent residue buildup |
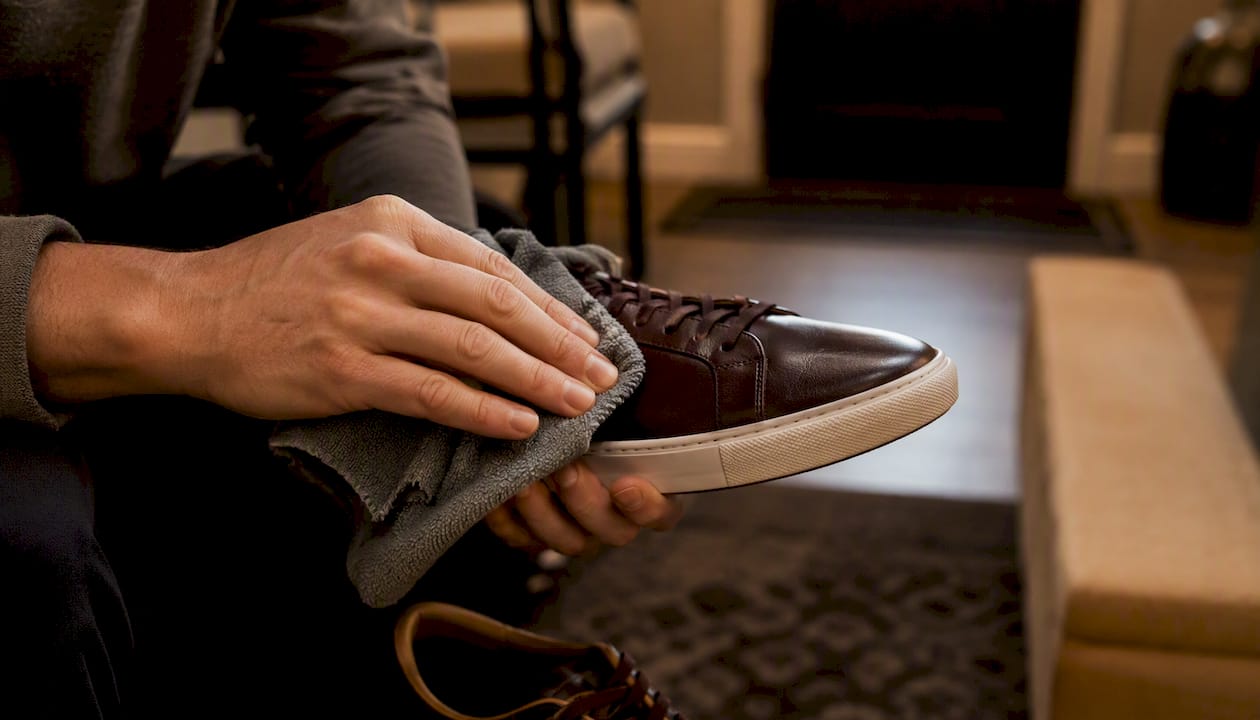
Leather responds well to a barely damp microfiber cloth and a leather-specific cleaner. Always follow with a conditioner to restore suppleness. Soaking leather causes it to stiffen and crack as it dries.
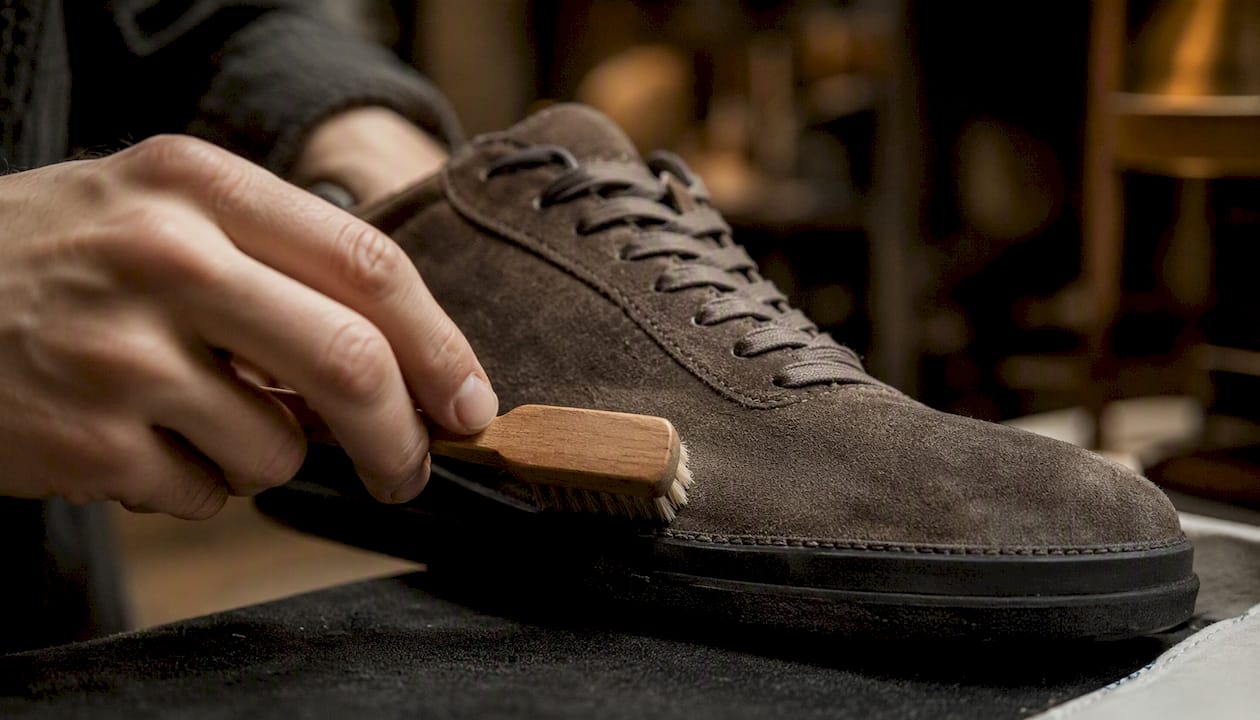
Suede and nubuck are the most unforgiving materials. Dry brushing with a dedicated suede brush handles most surface dirt. For scuffs, a suede eraser or even a clean pencil eraser lifts marks without moisture. Steam is a last resort and should be followed immediately by brushing while the nap is still warm. Nike’s suede care guidance confirms that machine washing weakens adhesives and distorts shape on these materials.
Canvas is the most forgiving. For white canvas, Wirecutter recommends a baking soda and hydrogen peroxide paste as a controlled whitening option, but advises testing carefully because overuse creates uneven results.
Knit and mesh uppers are delicate. Aggressive scrubbing frays the yarn and creates permanent texture damage. Dab gently, blot, and let the material breathe.
Pro Tip: For synthetic or vegan leather uppers, gentle soap and water usually work well, but always patch-test — some synthetic finishes react differently than genuine leather.
How to clean, dry, and when to replace laces and insoles
Laces and insoles carry most of a shoe’s odor and visible grime. Refreshing them separately makes a significant difference.
- Remove laces. Pull them fully out of the eyelets so every section gets cleaned.
- Hand-soak in mild solution. Submerge laces in warm water with a small amount of dish soap for 10–15 minutes. For heavily soiled white laces, a mesh laundry bag and a gentle machine cycle works when the manufacturer permits it.
- Scrub gently. Work the laces between your fingers or use a soft toothbrush along the length.
- Rinse thoroughly. Soap residue left in laces stiffens the plastic tips over time.
- Air-dry flat. Lay laces on a towel away from direct heat. Dryer heat damages the plastic aglets and can cause shrinkage.
- Clean insoles separately. Remove insoles and hand-clean with a mild solution and soft cloth. Never submerge foam insoles — they absorb water and take days to dry fully, creating a mold risk.
- Deodorize. Sprinkle a light layer of baking soda on dry insoles, leave overnight, and tap off before reinserting.
Replace insoles every 6–12 months depending on wear frequency, or sooner if you notice visible compression, cracking, or persistent odor that cleaning does not resolve. Laces are inexpensive enough to replace when they fray or yellow beyond recovery.
Drying, reshaping, and storage best practices
How you dry and store sneakers matters as much as how you clean them. Heat is the primary enemy of adhesives and shape.
- Air-dry at room temperature. Place shoes in a well-ventilated area, away from direct sunlight, which can yellow white materials and fade colors.
- Use shoe trees or newsprint. Both hold the toe box and heel cup in shape as the material dries. Cedar shoe trees also absorb residual moisture and odor.
- Never use a radiator, hair dryer, or tumble dryer. Direct heat softens the adhesive that bonds soles, and the shoe can literally separate at the welt. It also causes rubber midsoles to yellow.
- Avoid hot car trunks. Temperatures inside a parked car can exceed 130°F in summer, enough to warp synthetic materials and loosen glued construction.
- Store in breathable boxes or cloth bags. Airtight plastic boxes trap humidity and encourage mold, particularly in humid climates. Silica gel packets inside the box absorb excess moisture during long-term storage.
- Rotate pairs. Wearing the same shoes daily compresses cushioning and prevents full drying between uses. Rotating at least two pairs extends the life of both. For broader home-care habits that support this kind of rotation routine, the designer furniture maintenance guide at Mytotaltake covers similar preservation principles for premium materials.
Targeted fixes for scuffs, grease, yellowing, salt stains, and ink
Start with the mildest option and escalate only if it fails. Aggressive first attempts often cause more damage than the original stain.
- Scuffs on rubber or leather: A standard rubber eraser handles light scuffs on rubber soles. A melamine foam sponge (Magic Eraser) works on midsoles but can dull finished leather — use it only on rubber.
- Grease stains: Apply an absorbent powder (cornstarch or talcum powder) immediately, leave for several hours to draw out the oil, then brush off and follow with a gentle degreaser diluted in water.
- Yellowing: Oxidation-related yellowing on white rubber or canvas responds to hydrogen peroxide treatments, but full reversal is often limited on aged materials. Avoid bleach — it accelerates yellowing on rubber through a chemical reaction with UV light.
- Salt stains: Mix equal parts white vinegar and water, dab gently with a cloth, and blot. Salt stains from winter roads are alkaline; the mild acid in vinegar neutralizes them without soaking the material.
- Ink: Isopropyl alcohol on a cotton swab, applied to the ink spot only. Test on a hidden area first, and work from the outside of the stain inward to avoid spreading.
Pro Tip: Age-related yellowing on rubber midsoles is oxidation, not dirt. Harsh scrubbing or bleach will not reverse it and often makes the surface look worse. Oxidation-specific treatments exist, but set realistic expectations — prevention through UV-protective storage is more effective than any cure.
How to protect sneakers and maintain them between deep cleans
Routine maintenance reduces how often you need a full clean, and it preserves the material’s original texture and color far better than periodic aggressive treatments. GQ’s prevention-first approach makes this point clearly: a maintenance-first habit keeps factory finishes intact in a way that restoration simply cannot replicate.
- Brush after every wear. A quick 30-second dry brush removes surface dust before it works into the material.
- Spot-clean as needed. Address fresh stains immediately rather than letting them set. A damp microfiber cloth handles most fresh marks in under a minute.
- Apply a water-and-stain protective spray before the first wear and reapply every 4–6 weeks for frequently worn shoes. Use a formulation labeled safe for the specific material — suede and nubuck require a nap-safe formula, not a standard waterproofer.
- Light maintenance every 1–2 weeks for shoes worn several times a week. A full hand-clean every 4–6 weeks is sufficient for most casual wearers.
- Condition leather uppers every 2–3 months to prevent cracking and maintain suppleness. Consistent maintenance cadence is the single most effective habit for extending the life of any premium material.
Big mistakes that permanently ruin sneakers and how to avoid them
Some errors are irreversible. These are the ones worth knowing before you start.
- Machine washing leather or suede. Water saturation and mechanical agitation weaken adhesives, distort the upper’s structure, and flatten suede nap permanently. Once the nap is crushed by a wash cycle, it rarely recovers.
- Using bleach on colored or white materials without guidance. Bleach reacts with rubber compounds under UV light and causes yellowing rather than whitening. On colored uppers, it strips dye unevenly and leaves permanent pale patches.
- Drying with direct heat. A hair dryer or radiator softens the thermoplastic adhesive used in most modern sneaker construction. Soles can separate, and synthetic materials can warp or shrink.
- Aggressive scrubbing on delicate finishes. Over-scrubbing strips factory coatings from leather and frays knit or mesh uppers. The damage looks worse than the original dirt.
- Using undiluted household chemicals. Acetone, undiluted vinegar, and concentrated detergents all carry risks — acetone dissolves synthetic finishes, and undiluted vinegar can abrade light-colored materials with repeated use.
How long a clean takes and what it typically costs
Time estimates by task:
- Spot-clean: 10–20 minutes, including drying time for a small area
- Full hand-clean: 30–90 minutes of active work, plus 6–12 hours of air-drying
- Deep restoration (heavy staining, oxidation treatment, sole re-gluing): several hours to multiple days, depending on severity
Cost ranges:
- Household DIY (dish soap, old toothbrush, microfiber cloth you already own): effectively free
- Dedicated sneaker cleaning kit (cleaner, brush set, microfiber cloth, protective spray): roughly $10–$30 for a quality starter set
- Professional cleaning service: pricing varies by provider and condition, but premium restoration services for high-end sneakers typically run higher than a DIY kit
The decision to go professional usually comes down to material value and damage severity. For everyday canvas or knit sneakers, DIY is entirely sufficient. For premium leather, rare colorways, or shoes with significant sole separation, a professional who specializes in sneaker restoration is worth the cost. PicaasoFootwear confirms that most sneakers respond well to the home-DIY approach when the method matches the material.
Myth vs. fact: what the research actually says about home remedies
Common household remedies circulate widely, but several carry real risks that viral tutorials rarely mention.
- Myth: Baking soda and vinegar together make a powerful cleaner. Fact: The two neutralize each other on contact, producing water and carbon dioxide. Neither the mild abrasive action of baking soda nor the mild acid of vinegar survives the combination. Nike’s care guidance cautions that baking soda and vinegar can cause discoloration or yellowing on light materials if overused or improperly diluted.
- Myth: Bleach whitens sneakers. Fact: Bleach reacts with rubber under UV exposure and accelerates yellowing. It also strips dye from colored materials unevenly.
- Myth: Machine washing is fine for most sneakers. Fact: Machine washing is acceptable for some canvas or textile sneakers when the manufacturer explicitly permits it, but not for leather, suede, or shoes with glued construction.
- Myth: Toothpaste cleans everything. Fact: Non-gel white toothpaste works on rubber soles because of its mild abrasive content, but it can leave residue on fabric uppers and should never be used on suede or leather.
- Safe alternative for yellowing: Oxidation-specific treatments (hydrogen peroxide applied carefully to rubber midsoles) show results, but Wirecutter advises testing carefully because whitening methods can create uneven results if overused.
Prevention is more powerful than any restoration technique. Once a factory finish is stripped or a texture is altered by harsh chemicals, returning the shoe to its original state is rarely possible at home. Routine light cleaning and protective sprays preserve materials better than infrequent, aggressive treatments ever will.
A practical perspective on sneaker care
Most sneaker care advice focuses on rescue — what to do when shoes are already dirty or damaged. The more useful habit is the one that makes rescue unnecessary.
My weekly routine is straightforward: a dry brush after every wear, a quick spot-check for fresh marks, and a protective spray reapplication once a month. That three-step habit has kept leather and suede pairs looking sharp far longer than any deep-clean session. The single most underrated step is applying a water-and-stain spray before the first wear, not after the first scuff. By then, the material has already absorbed whatever it was going to absorb.
There is also a tendency to overestimate what cleaning can recover. Yellowed rubber midsoles, flattened suede nap, and stripped leather finishes are largely permanent once they occur. The energy spent on aggressive restoration is better invested in the protective habits that prevent those outcomes. Knowing what qualities make a premium product last applies to sneakers as much as it does to any other high-end purchase.
Mytotaltake’s premium sneaker care collection
Caring for quality sneakers deserves quality tools. Mytotaltake curates a premium sneaker-care kit built for discerning wearers: a pH-neutral cleaner, a dual-bristle brush set, two microfiber cloths, a nap-safe protective spray, and a breathable storage bag, all selected for lasting performance across leather, suede, canvas, and knit materials.

For readers who prefer to build their own kit, single-item options are available across the site. Whether you are outfitting a full sneaker rotation or protecting one prized pair, the right tools make the difference between a shoe that ages gracefully and one that doesn’t. Browse the premium accessories guide at Mytotaltake to find the care essentials that match your collection.
Sources
- How to wash your sneakers — GQ
- How to Clean White Sneakers | Reviews by Wirecutter
- How to Clean Sneakers at Home | Easy Guide (2026)
- How to Clean White Shoes (No Matter the Material) — Better Homes & Gardens
- How to Clean White Trainers Without Ruining Them — Vice
- How to Clean Vegan Handbags Naturally and Safely – The Cork Store










Leave a comment